
Introduction
Have you ever looked at a beautiful photo or a crisp company logo and thought, "This would look amazing stitched onto a jacket or a team uniform"? You are not alone. The demand for custom embroidery has skyrocketed, and at the heart of this creative explosion is the humble PES file. But here is the thing: converting a simple image into a PES embroidery file is not as simple as hitting a button. It is an art form mixed with technical know-how. Whether you are a small business owner looking to brand your merchandise, a sports team coordinator ordering custom jerseys, or a hobbyist with a new embroidery machine, understanding the conversion process can save you time, money, and a whole lot of frustration. Custom image to PES file service is the bridge between your digital vision and the physical reality of thread and fabric, and getting it right makes all the difference between a professional finish and a tangled mess.
What Exactly is a PES Embroidery File?
Let us start with the basics. A PES file is the native format used by Brother and Babylock embroidery machines, though it has become widely accepted across many other brands. Think of it as a set of highly specific instructions for your embroidery machine. Unlike a standard image file like a JPEG or PNG, which just captures color and shape, a PES file tells the machine exactly where to move the needle, how fast to go, what color thread to use, and in what sequence to stitch each element.
The magic lies in the density, the stitch angles, and the underlay stitches that provide stability. A well-made PES file will have smooth curves, minimal jumps between sections, and a logical sewing order that prevents thread breaks and fabric puckering. A poorly made file, on the other hand, can turn a promising project into a frustrating experience with birds-nests of thread and distorted designs.
Why Precision in Conversion Matters More Than You Think
You might wonder, "Can't I just upload my photo to some free software and get a PES file?" Technically, yes, you can. But the results are often disappointing. Automatic conversion software is getting smarter, but it is still no match for a skilled digitizer. Here is why precision matters so much.
When an image is converted, the software looks at the pixels and tries to map them to stitches. If your image has gradients or subtle color changes, the software will often create thousands of tiny, chaotic stitches that look like a messy scribble. This not only ruins the visual quality but also puts excessive strain on your machine and thread. A professional digitizer will manually map out the design, reducing the number of stitch points while maintaining the integrity of the image.
Furthermore, different fabrics require different approaches. A design that looks perfect on a firm canvas tote will completely distort on a stretchy knit polo shirt. Precision in conversion means adjusting stitch density and compensation to account for fabric pull. Without this, your circle might come out as an oval, or your text might become illegible.
The Step-by-Step Journey from Photo to Stitches
So, how does an image actually turn into a PES file? Let us walk through the typical process used by professionals, which gives you a clear picture of what goes into that custom image to PES file service.
Step 1: Image Analysis
The digitizer starts by looking at your image. They check the resolution, the colors, and the complexity of the shapes. High-contrast images with solid blocks of color are the easiest to convert, while photographs with lots of shading are the most challenging.
Step 2: Manual Tracing
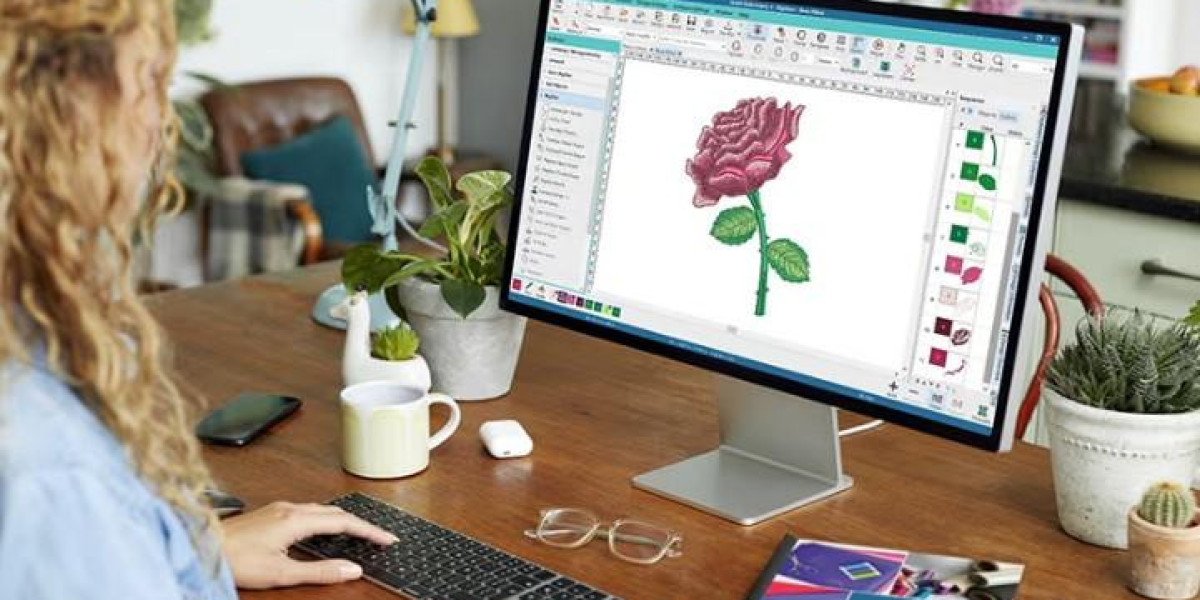
Using specialized software, the digitizer traces each element of your design. This is not an automatic function; it is done by hand, creating paths that the needle will follow. They decide which areas will be filled with satin stitches, which will use fill stitches, and which need simple running stitches for outlines.
Step 3: Assigning Colors and Thread Types
The digitizer selects specific thread colors from brands like Madeira or Isacord. They also choose the stitch type. For example, a red apple might use a satin stitch for a shiny, smooth finish, while a grassy field might use a tatami fill for a textured look.
Step 4: Adjusting for the Medium
This is where the expert earns their keep. The digitizer decides on the pull compensation, which essentially means "stretching" the design slightly in certain areas so that when the fabric pulls during sewing, the final result looks correct.
Step 5: The Test Stitch
Before the final file is sent to you, a reputable service will run a test sew-out. This physical sample catches errors that you cannot see on a computer screen. Once the test looks perfect, the final PES file is exported and saved for you.
Common Mistakes to Avoid When Converting Images
If you are tempted to try the DIY route, or if you are simply curious about what to look out for, here are the common pitfalls that plague image-to-PES conversions.
Ignoring the Resolution
If you send a tiny, pixelated image to be converted, the software has no data to work with. You end up with a blocky, jagged design. Always supply the highest resolution image you can find.
Too Many Colors
For embroidery, less is often more. Using more than 8 to 10 different thread colors in a design can create chaos and increase production time significantly. Simplifying the color palette often yields a cleaner, more recognizable design.
Forgetting About Size Scaling
An image that looks great as a 12-inch wide chest logo might look terrible as a 2-inch tiny emblem for a cap. Small designs need less detail. If you force too much detail into a small space, the stitches become so dense that the machine simply cannot sew them without breaking the needle.
Using the Wrong Software for the Job
Free online converters are wonderful for quick drafts, but they lack the advanced functions necessary for professional results. They ignore fabric properties and use a one-size-fits-all approach that rarely works in the real world.
Tips for Getting the Best Results from Your Custom Image to PES File Service
To make sure your experience is seamless and your final product is spectacular, a little preparation goes a long way. Here are my top tips for anyone ready to send their artwork off for digitizing.
Provide Clear Briefs
Tell the digitizer exactly what you are embroidering. Is it a heavy denim jacket? A light silk scarf? A baseball cap with a foam front? The more information you give, the better they can tailor the file to your needs.
Maximize Your Image Quality
Before you send your logo, open it in an editing program and boost the contrast. Convert any gradients to solid colors if possible. If it is a photograph, consider converting it to a cartoon or vector style. This gives the digitizer a much clearer roadmap to follow.
Ask for the Test Stitch File
Never skip this step. If a service offers test stitching, take it. Seeing the design physically stitched allows you to request tweaks to the density or size before you run hundreds of pieces.
Trust the Process
Digitizing is a skill that takes years to master. Trust your digitizer’s advice on color changes or size adjustments. They often know what will look best in thread even if it looks slightly different on screen.
Why Professional Digitizing Saves Money in the Long Run
I know, I know, you might be looking at the price tag of a professional custom image to PES file service and wondering if it is worth it. Let me tell you a story. I once watched a small business owner try to cut corners by using auto-digitizing software. They spent hours fighting with their machine, wasted half a box of expensive thread, and ruined a dozen shirts. In the end, they had to scrap the project and start over with a professional, costing them three times the price.
A professional digitizer provides you with a file that is optimized for speed, meaning your machine does not waste time doing unnecessary jumps or color changes. This reduces your production time and thread usage. Moreover, a high-quality file extends the life of your machine by reducing stress on the internal mechanics. When you factor in the time saved, the thread saved, and the frustration avoided, professional digitizing is actually the cheaper option.
The Future of Embroidery Digitizing
Technology is moving fast. We are seeing the rise of AI tools that can auto-detect shapes and suggest stitch patterns. However, I do not think these tools will replace human digitizers anytime soon. The nuance required to account for fabric stretch, needle penetration, and thread tension is too intricate for a machine to fully grasp without human oversight. What we will likely see is a hybrid model, where AI does the heavy lifting of initial tracing, and the digitizer refines the file to perfection. This marriage of speed and accuracy is the holy grail of the industry.
Conclusion
Turning a beloved photo or a prestigious logo into a PES embroidery file is a journey that requires patience, skill, and a keen eye for detail. It is not just about pushing pixels through a software filter; it is about understanding how thread interacts with fabric and how light plays on different stitches. Whether you are an embroidery veteran or a newcomer excited to stitch your first design, you now have the knowledge to make smart choices.
Do not let the allure of a quick, free conversion tempt you into settling for mediocre results. Your brand, your gifts, and your projects deserve better. Embrace the art of precision digitizing, and watch your creations transform from simple images into tactile, beautiful works of textile art. Remember, the best custom image to PES file service is the one that treats your design with the care it deserves, ensuring that every stitch tells a story of quality and excellence. So go ahead, send off that image with confidence, and get ready to see your vision stitched into reality.